Understanding the quality and direction of light is the core of professional photography. Understanding how to control it is critical. Sometimes that means modifying it for optimum results.
This is true regardless if you shoot with the latest high-end cameras or your cell phone. The light source, quality of it, and the direction all play a key factor in your results. Light is one of the strongest ways we can make a statement in the style of photography we do to bring out the personality of our subject.
Regardless of whether it is natural light or strobe, they are essentially the same in the sense that the size, direction, and intensity all affect how you use it with your subject. That in turn affects how you pose them in order to flatter them with that light source as well.
Let’s look at the facts of light –
- The smaller and farther away your main light source is from your subject, the sharper and more contrasty it will look.
- The larger and closer your main light source is to your subject, the softer and less contrasty it will appear on your subject.
- If you add some form of diffusion between the light source and your subject with either it softens the shadow edges.
Both of these lighting styles are tools in your imaging toolbox. There are times you might want a high contrast look to create drama, portray attitude and maximize impact. There are other times you want something soft to portray a more elegant and timeless traditional portrait.
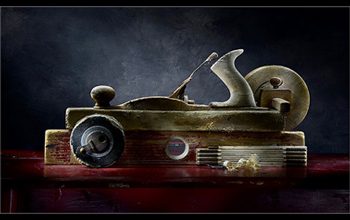
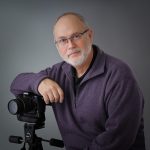
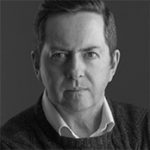
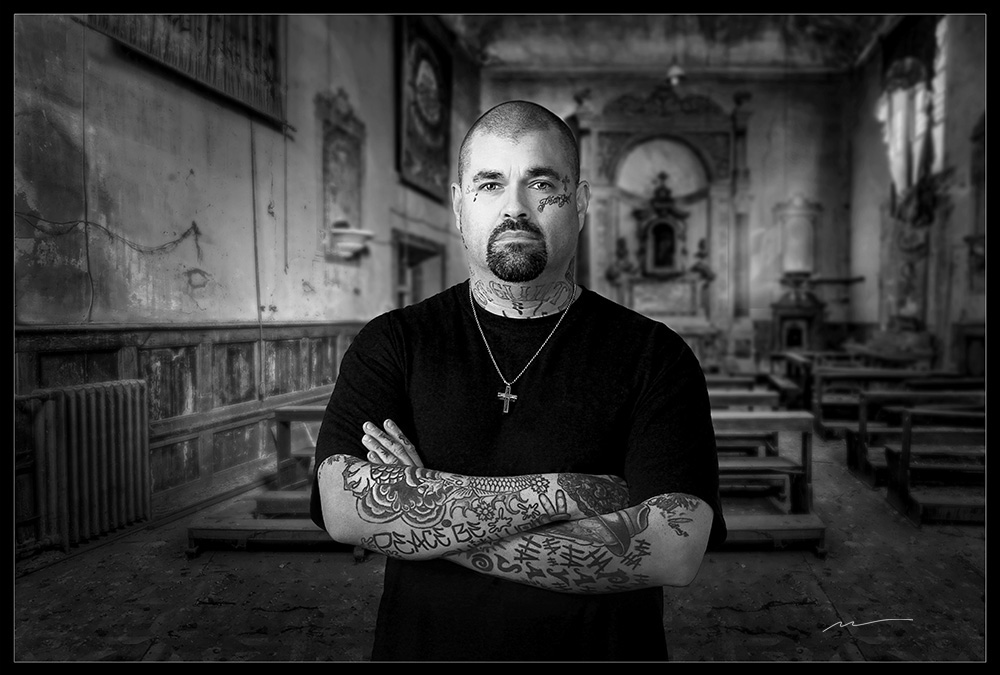
This is a portrait of one of our printers here at Marathon, Richard Haswell. I created it with a strobe shot thru a light panel covered with Ripstop Nylon. There was an identical panel on the other side as a reflector. It would’ve been easy to do a very dramatic overhead light to create a really tough-looking image but that would not be Richard’s personality. This Rembrandt style of light still gives him a strong look but not scary!
I personally love soft boxes due to the flexibility of changing from soft light to dramatic with just the removal of the front diffuser. By removing the front panel you get a harsher, bare bulb light source for a high contrast look. Or you can just peel away a corner of it to produce a small area of direct light with the rest diffused creating 2 light sources essentially from the same light.
There are times when I want the biggest light source I can find. If there’s not a big panel of windows available or it’s dark out, I use a combo of big panels made from rip-stop nylon or a white bed sheet to shoot a couple of strobes side by side thru it. By having the strobe heads separate from the panels I can angle the heads slightly upwards so the light naturally falls off a bit from the bottom if I want that effect. I can also angle one up and the other down or whatever I want to do to feather the light.
I can also use these same panels as reflectors or even as backgrounds. The best part is when I am done with them I can take them apart quickly and store them away or travel easily with them as the frame is made out of PVC. The rip-stop nylon or bed sheets are cut to the size of the panel and elastic bed sheet strips can be glued or sewn to the edge corners of each fabric so it simply slips into place.
You might find having some black rip-stop nylon panel is handy too. There are times you have a room that has a lot of bounce around light due to the lightness of the wall with many windows around that it affects the intensity or color of light. Having the black panels brings everything back in control.
There have been a few occasions where I needed a large softbox for a nice soft light that goes from floor to almost ceiling or a reflector that does the same thing. Regardless if it’s because of budget, the need for a custom size, or the inability to justify the investment of a piece of equipment you’re not planning to use much, making your own might be just what you need.
Because light modifiers can add up in cost and it helps to either borrow someone else’s to test them for consideration. If you don’t plan to use it much or the budget just can’t justify the purchase, you might consider making your own.
Much like duct tape, PVC pipe is every photographer’s best friend and it doesn’t require a lot of time or skill to make a light modifier. Basically, if you have a PVC Pipe cutter (about $15 at most hardware stores) or a hacksaw, you can easily cut your pipe.
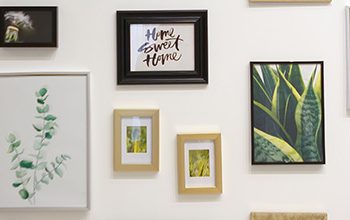
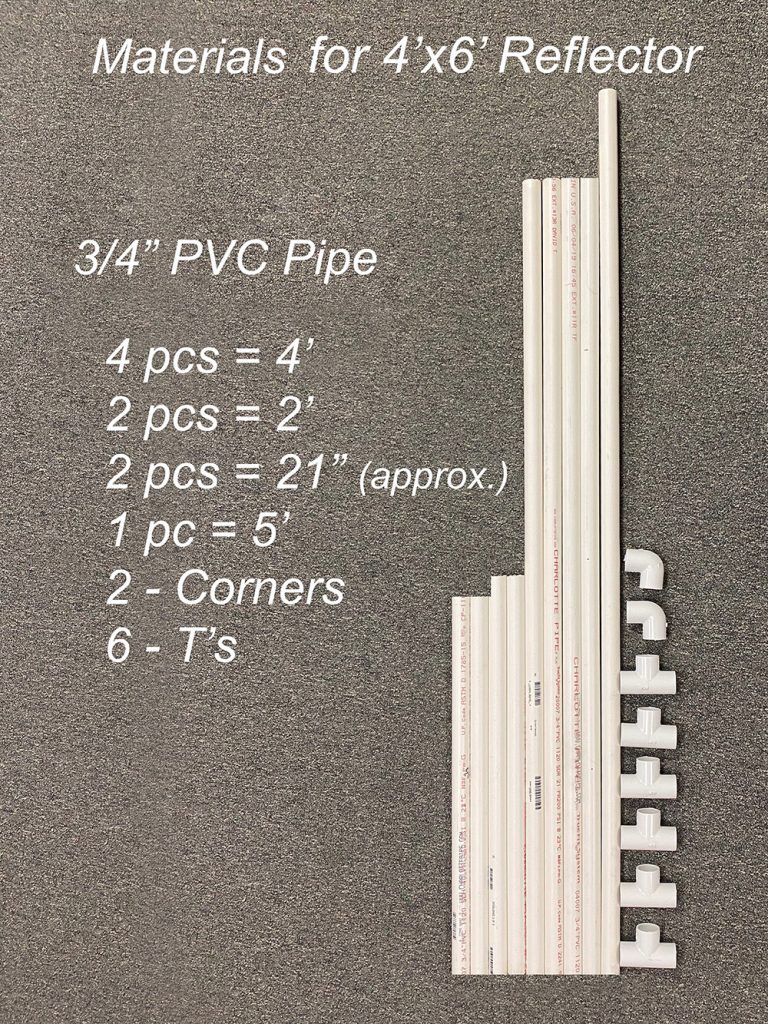
The great thing about making your own is you can custom size it to fit the space you have. You can also afford to build multiple for a variety of sizes when needed as well. Here’s an example of a 4’ x 6’ panel that I made to be used as a light modifier, a reflector, or even a background.
Materials you’ll need:
3 -10’ lengths of ¾-inch PVC
Cut to these size pieces
4 pcs 4’ (top, bottom, and bottom sides)
2 pcs 2’ (top sides)
2 pcs 21” (Center bars with center leg. Measure and cut these last for ideal fit)
1 pc 5’ (the leg to prop up)
By the way, you don’t have to glue any of these fittings. In fact I would suggest you don’t because PVC fits together snugly and this allows you to disassemble it for storage of easy transportation. And you want the back brace to be able to swing out to balance your panel.
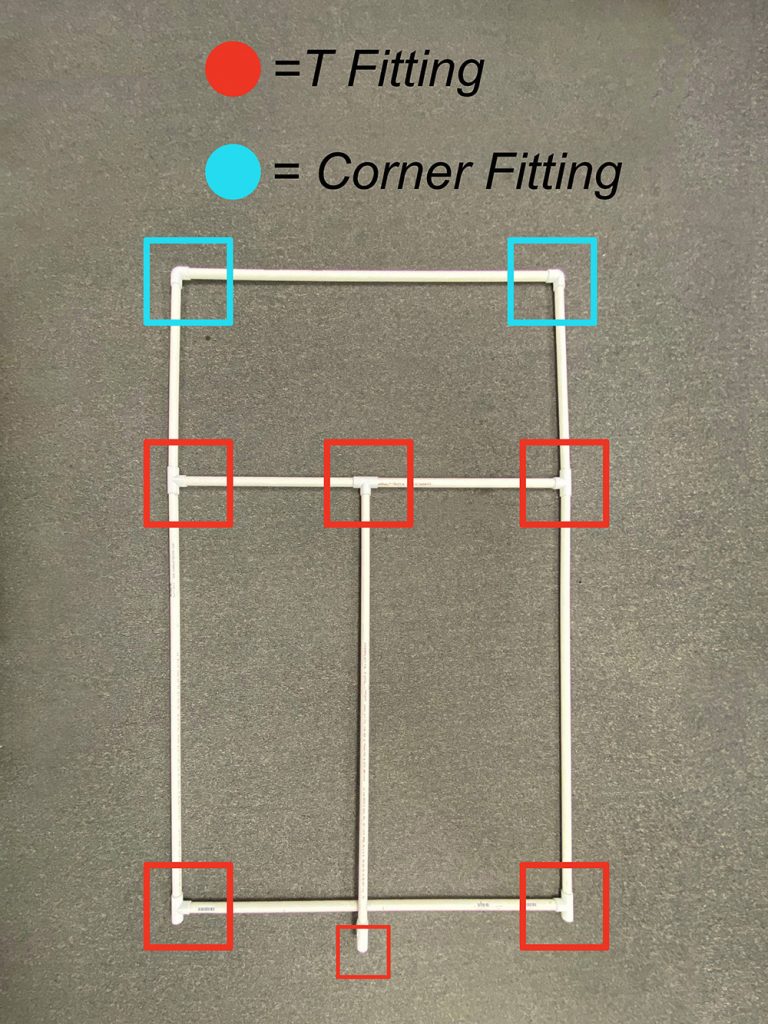
Here’s what you need to build your own 4′ x 6′ panel –
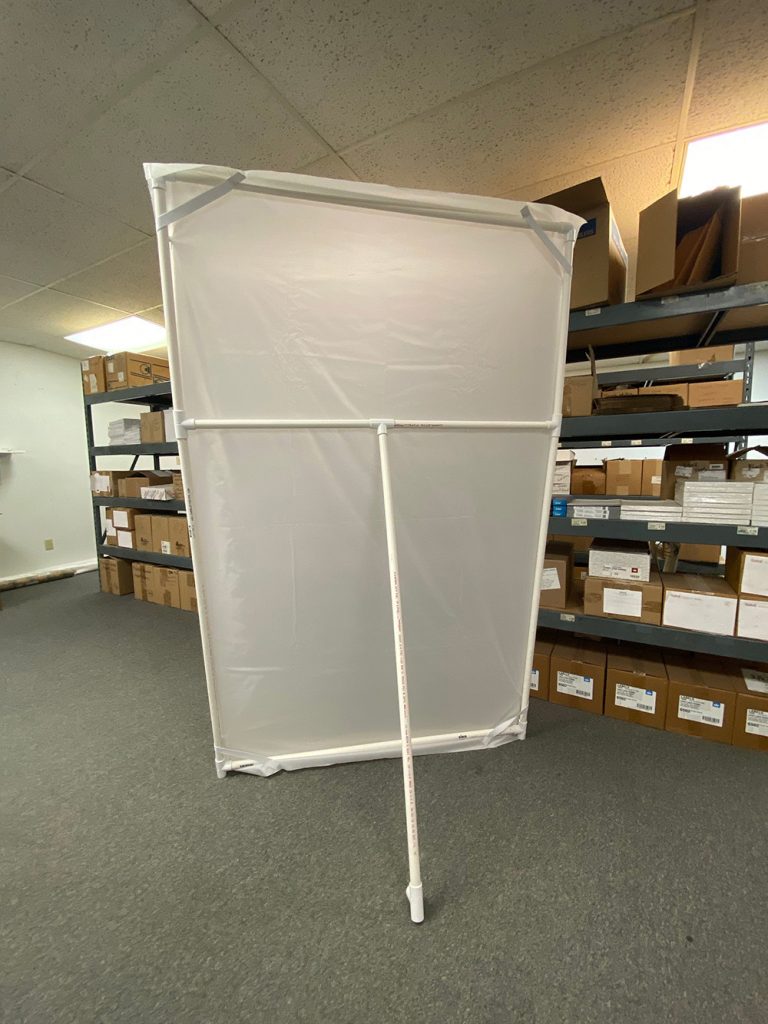
On the diagram below you’ll notice how the corner and straight edge fittings apply. You’ll also notice on the bottom left and right I used a T fitting instead of a corner. I personally like the T fitting because it gets my diffuser/reflector off the ground a bit. Plus it tends to not slide as much as a rounded corner. Your back leg brace will be a little longer than the frame when folded. This is because as the brace swings out it needs to be a little longer to keep the panel more upright.
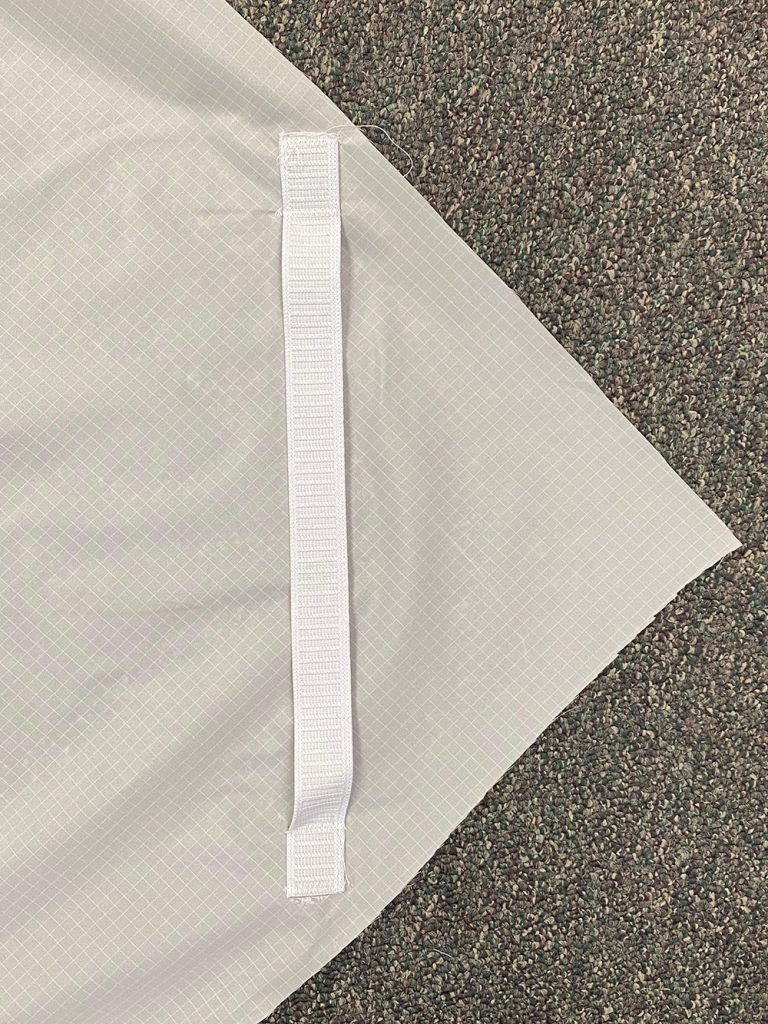
Purchase your ripstop nylon or white bedsheet anywhere fabric is sold. You might need to trim it for a better fit on your frame. FYI – ripstop cuts well and doesn’t run or tear and continue to get worse with each use.
Add some elastic straps to the corners of your fabric. this is what will hold your fabric onto the frame. You can sew it on or use fabric glue to attach it as I did with mine. And as far as fabric, rip-stop is a little thinner and lets light get thru a bit more than a cloth bedsheet, which I sometimes prefer for maximum diffusion. It’s also easier to use that as a backdrop when needed too because it’s not as thin. Because they are so cost-effective you might purchase both to have both on hand.
The front
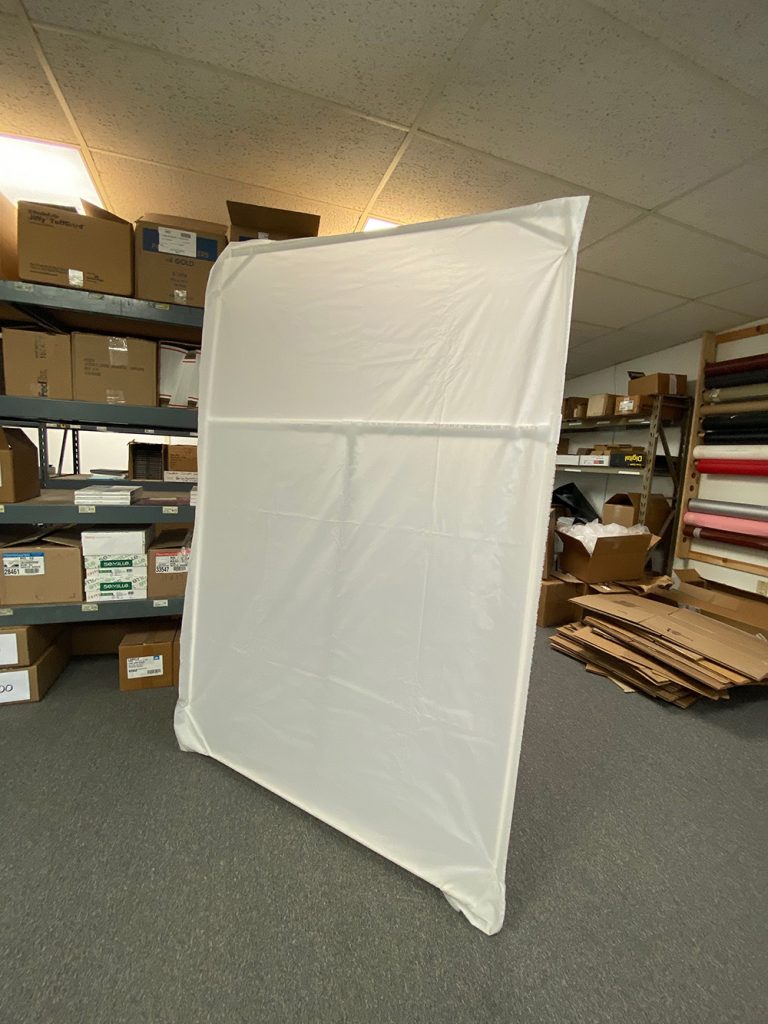
The Back
There are all sorts of variations in designing this sort of panel. What I like best about this is it’s easy to move with one hand. It stores flat against a wall when finished and you can even hang it from a hook on your wall as well. And if you really don’t plan to use it for a while you can take it apart and store it away without taking up much space.
I love the versatility of these panels. They are fun to make and obviously very affordable. I encourage you to give it a try if you’re interested in creating a large main light for maximum softness and plenty of room to move around the set without messing with the main light.
BONUS: Here’s an outdoor lighting solution Dean Collins taught years ago that I totally forgot about but it’s as relevant today as it was then. It involves a diffusion panel and a Plexiglas mirror. With your subject in a shady spot, you have an assistant stand in the sunlit area and bounce the sunlight towards the subject. Between that Plexiglas and your subject, you need a diffusion panel to soften the light bounced towards the subject. Watch Dean in action on this YouTube video –